About the Nar Phu Valley Trek

Himalaya
country
Nepal
length
70 km(43 mi)
Type of trail
Long-distance
difficulty

Difficulty is highly personal. Be aware of the weather conditions as bad weather turns easier trails in difficult trails especially in the mountains.

Difficult, Strenuous
accommodation

Lodging means a mix of hotels, hostels or AirBnB’s.

Lodging
Elevation gain
5100 m(16732 ft)
terrain
Mountains
remoteness
Most of the time
Show more

The Nar Phu Valley Trek is a 7-13-day trek in the Nar Phu Valley of Nepal. It is named after two prominent towns in the Nar Phu Valley: Nar and Phu. The valley is within the Annapurna Protected Park in Nepal and is situated between the Annapurna Circuit and the Manaslu Circuit. This trek is very remote, and you will only see a handful of other hikers throughout your time on the trail.

Trekking in the Nar Phu Valley is a very unique and special way to see Nepal, although it should only be attempted if you are already familiar and experienced with high-altitude trekking. The trail starts at 2600 meters and climbs to 3560 meters on the first day, remaining above 3500 for the rest of the trek. This is a trail that requires a guide and has daily permit costs. However, don’t let this deter you: the Nar Phu Valley Trekking is one of the most spectacular and remote trails in Nepal.

women in blue smiling at camera
Editor

Katie Mitchell

After a whirlwind 10 years on the road (and trail!), Katie has hiked the Camino Frances, the Peaks of the Balkans, the Fisherman’s Trail, the Cumbria Way, the Pembrokeshire Way, and more in Europe and the United States. She is an avid trail runner and you can find her either on the trail or in a cafe in a new city, sampling all of their gluten-free treats. You can follow her adventures on Instagram.

View profile

The Trail

The Nar Phu Valley Trek begins in the town of Koto. However, getting to Koto is a journey of its own before the trek even begins. To get there, you must first take a bus from Kathmandu to a town about seven hours away, called Besishahar, and then from there take a Jeep for about four hours of off-roading to Koto. It’s quite the journey, but it’s worth it.

Once you arrive in Koto, your guide will help you find a teahouse to spend the night. This is one of the larger towns you will pass through on the trek and overlaps with the Annapurna Circuit, so you will see other hikers. It is recommended to spend an extra day here (two nights) to acclimate, since Koto is already at 2600 meters. You can make your rest day here an active one and hike to Upper Pisang, which is quite high, and then take a Jeep back to Koto to help with acclimating. However, if you don’t have enough time, you can just begin the next day after arriving.

When you begin the trek from Koto to Meta, as with many long-distance trails, you will begin in the forest. However, on the Nar Phu Valley Trek, the forested section is through a beautiful, scenic valley where you follow the Phu Khola river upstream through a gorge. The trail is shaded and cool as you start. You will pass a few small villages comprised of a couple of stone or wood buildings. You can stop here for a tea or lunch before continuing onward. When you stop at these, it will give you your first taste of the culture of the Nar Phu Valley. Already different from the more-connected Koto, you’ll see photos of family members strung up above the tables, hear the chickens and donkeys outside, and the laughter of the owners and guides as they cook and eat together in the kitchen.

Eventually, you will reach Meta at a plateau where the alpine opens up. The first day can be long, about five or six (or seven) hours, even though it is only 15 km. Most of the trail is fairly flat with small hills until you reach the last hour of the day, when the trail begins to ascend steeper and steeper until you reach Meta. You’ll start to feel the altitude at this point, because you start in Koto at 2600 meters, and Meta is at 3560 meters, so you’ll already have a good taste for the alpine.

The second day, you will hike from Meta to Kyang (3820m). This is only three or four hours and much easier as you only climb 200 meters throughout the day. It’s beautiful and Nepali flat for the most part. You’ll no longer be hiking in the forest, but instead along the slope of the mountains, where you’re surrounded by views of snowy peaks and even get to see the second Annapurna peeking out from behind other mountains. You will pass a small town called Chyaku, where you can have lunch on the second day. By the time you reach Chyaku, it’s already 3800 meters, so take your time and go slow.

Around Chyaku and Kyang, you’ll likely see yaks up on the hillside. You’ll also see a football field where locals gather to play games near the police station. All of this makes it sound like there’s quite a large population, but it’s very small, only a few dozen people between the two outposts. This is wonderful because there’s more wildlife here than in other popular regions in Nepal, like snow leopards! Apparently, there is a snow leopard in the Chyaku basin that preys on small animals that the teahouse owners are familiar with.

You’ll sleep at Kyang this night before continuing onto Phu, the first of the two villages of the trek, it is named after. Kyang is a town even smaller than Chyaku, with only three teahouses available. However, sleeping here will get you closer to Phu, making it a shorter and more manageable day.

Once you arrive at Phu, you will be mesmerized by this village tucked into the hills. The city is an ancient and very high, 4250 meters, and another 150 meters above it is a 600-year-old monastery that you should also visit. You’ll see that there are shops and cafés and people living their lives; this is not just a town built for tourism like some of those before. After you explore Phu, you have the option to take one more day and climb up to the Himlung base camp, which is another 1000 meters of climbing. It is recommended and in most itineraries to take a rest day in Phu to acclimate. Even if you choose not to hike to the base camp, you can also do other nice hikes in the area to acclimatize.

Once you leave, you will return back in the direction of Meta. However, a kilometer or so before Meta, you will reach a bridge that you’ll cross to the other side of the gorge, where you will continue the trek to the Nar Phedi Monastery. Many people sleep at this monastery, as it’s a great resting point after a full day. You can also explore the region around the monastery with shorter hikes to different temples and pagodas. From the monastery, you will hike up to Nar the next day. The Nar Phu Valley is on the border with Tibet, and the monasteries reflect the closeness with the region. You see many buddhist statues, pagodas, and places of worship throughout the trek that make it a very special cultural place.

Nar (4300m) is the final village before you come to the Kang La pass. Nar, similar to Phu, is an old city built into the hills. It is also the highest village in Nepal! Here, you will find old homes, all built in stone with colorful roofs, and a few guest houses above the village. The town is full of horses, cows, birds, and dogs, all running around. You’ll hear babies cry and watch the stars come out over the ridge in front of you. It is truly majestic and feels like stepping back in time.

From here, you will have an early morning as you hike the Kang La pass. The pass sits at 5320 meters, and takes about six hours to summit. From here, you will then descend to Ngawal. The descent is very steep and will require a lot of concentration. Because there are no teahouses on the way down, it is important that you pack enough food to stay sharp as you make your way down. When there is snow on the pass, the descent can be very icy, and you will need microspikes. And even when there is no snow, the descent is still slippery with loose gravel, dirt, and scree.

Once you’re down from Kang La, you can then choose to finish your trek at Ngawal, walk one more day, mostly flat, to Manang, or hike back towards Koto to close the loop. This depends on how much time you have. However, be aware that Nar is very high, and it is common to feel symptoms of altitude sickness here if you’re not properly acclimatized. Assess with your team what the best choice is; if you feel altitude sickness, it may not be wise to cross the pass. If you must, you can return down to the monastery and then back down to Koto. This can be done in one long day or two midsize days. Remember, it’s always better to be safe than to climb higher.

Stages

You can decide with your guide how you want to plan out the trek. You can finish it in as few as seven days, or there are possibilities to extend the trek with the addition of Thorang Phedi, which adds another 5 days. It should be noted that the trek can be completed as a circuit, and you can hike back to Koto from Ngawal. However, since they have built the 4×4 road in the region, this has become increasingly unpleasant to hike along, and it is better to complete the trek as a point-to-point hike. The GPX listed here is 86 kilometers and includes the Himlung base camp. However, if you don’t hike to the base camp, it is 70 kilometers.

There are two factors to consider as you plan your itinerary: your permit length and comfort at high elevations. If you know that you will need more time to acclimate, which is very normal, it is worth adding in multiple active rest days. You will then need to add extra days to your RAP permit, which is $15 per day over the first week you are there. You can find more info on this in the “Good to Know” section below.

This is a suggested 8-day itinerary that takes acclimatization into consideration. If you choose to add Thorang Phedi, you will add on roughly 5 days to your itinerary and end in Muktinath. If you want to keep the trek under one week for your permit, you can skip the first acclimatization day in Koto, although you should assess your comfort with altitude before choosing to skip it.

Suggested 8-Day Nar Phu Valley Trek Itinerary

Stage 1:

Koto acclimatizing day: active rest in Koto, hike to Upper Pisang, and take a jeep back

Stage 2:

Koto – Meta, 15 km | 9.3 mi

Stage 3:

Meta – Kyang, 9.5 km | 5.9 mi

Stage 4:

Kyang – Phu, 8 km | 5 mi

Stage 5:

Phu acclimatizing day: active rest in Phu, hike to either Tashi Lhakhang Monastery or Himlung Basecamp

Himlung Base Camp return trip, 18 km | 11.2 mi

Stage 6:

Phu – Nar Phedi Monastery, 17 km | 10.5 mi

Stage 7:

Nar Phedi Monastery – Nar, 5 km | 3 mi

Stage 8:

Nar – Kang La Pass (5320M) – Ngawal, 15.3 km | 9.5 mi

Accommodations

Throughout the Nar Phu Valley trek, there are teahouses and a monastery where you will sleep. Because it is a less-frequented trail than the other major Nepalese treks, you will not need to book your beds in advance. However, it is still wise to arrive before dark to ensure they can make you dinner and you can cozy into your room before it gets too cold. Most nights, you may even have the place to yourself, as guides are in the practice of spreading hikers out across the teahouses to give business to each family.

Throughout the trek, you will have your own room, usually with two twin beds, and often have the option of choosing a room with an en-suite bathroom. Be aware, though, that most bathrooms consist of pit toilets and will not have shower options or a sink to wash your hands; it is essential to bring hand sanitizer. You will also want to bring a sleeping bag or a sleeping bag liner. The teahouses provide blankets and pillows, but these are not washed between uses. If you sleep cold, a sleeping bag will be very helpful, as there is very little insulation in the rooms. It is also normal to ask for extra blankets if you need them.

Best time of the year

The best time of year to hike the Nar Phu Valley Trek is between March and April and September and November. These are the dry seasons that avoid cyclones and snow. You may, of course, still have snow and ice at the Kang La pass (5320M), but otherwise, you should have a dry and clear path in these months.

Safety & Gear

One thing about the Nar Phu Valley is that it is much more remote than other regions in Nepal like the Annapurna, Langtang and Everest areas. This means that you will have less access to the Internet, cell data, or even showers. Be prepared by bringing baby wipes for washing your face and body in the evenings, as well as downloading any music, podcasts, books, or TV shows that you want for the evenings. It may also be nice to bring a book to read or cards for when you arrive. You will not find many other trekkers, so this is a trek better done in a group if you’re a social person.

You should also bring shoes that have waterproofing, or at least gaiters, for when you cross the Kang La pass, micro spikes for the snow, polarized glasses with side shields for when you’re up in the peaks, as well as multiple layers and windproof clothing. It gets quite windy in the afternoons. Alongside these, you may also want to bring poles, as these can be helpful on the steep ascent and descent of the Kang La pass and the loose rocks that make up the trail throughout the route. We were glad to have two different down jackets with us, one that we could wear while we hiked and one that stayed fresh for the evenings. It was also great to have a thermal set to sleep in and a thermal liner or sleeping bag for the night.

The teahouses provide pillows and blankets, but they are not washed throughout the season. If you are unsure of whether you should bring a sleeping bag liner or a sleeping bag, assess if you sleep cold or warm. If you tend to sleep cold, bring a sleeping bag, as there is almost no insulation in the rooms, and it drops below freezing at night. Additionally, it’s recommended that you bring a battery pack for charging your devices, as there isn’t always the option to charge at your teahouse. And finally, bringing a pack of wet wipes and some lotion will be very welcome, as there are no showers on the trek.

It is up to you if you choose to hire a porter for the trek. Since it is shorter, you won’t need to bring much with you other than your clothes. We managed without a porter, although we packed very light. If you are concerned about carrying your clothing, you can hire a porter through the same company where you hire your guide.

Altitude sickness

Be aware of altitude sickness. The trek is above 3500 meters for the most part, and at the highest resting point, you are sleeping in Nar at 4300 meters. It’s common to have headaches, feel nauseous, or have difficulty sleeping as you get higher up. If you feel any of these symptoms, you should make sure you take Diamox, Paracetamol, and/or go down based on the recommendations of your guide. Be sure to tell the people around you of any symptoms you feel, even if they seem minor. Altitude sickness can impact judgment and should be assessed by your team. Your health is the most important consideration of your trek.

Difficulty

The Nar Phu Valley trekking is a difficult to strenuous trail that should only be attempted by people who are familiar and experienced in high-altitude trekking. While the paths along the trail are well-maintained and wide, hiking at such high elevations throughout the entirety of the trail means that altitude sickness is a real possibility and should be approached with caution. Because the trek starts at 2600 meters in Koto, it is important to acclimatize before beginning the trek to Meta, where you will sleep at 3560 meters. Additionally, the Nar Phu Valley is a very remote area with almost no cell reception or wifi throughout the week you will be there. Thus, you should be comfortable assessing and making difficult decisions if an emergency arises.

Good to know

At the Kathmandu airport, you will see the option to get a NCell SIM card for your phone. Skip this, and instead get a Nepal Telecom SIM card, as these have the best signal in the mountains.

For trekking in the Nar Phu Valley, you are required to have a guide with you and need to purchase Restricted Area Permits (RAP) for the region, as it is a protected area. It is also important to understand how to get to Nar Phu Valley, as it adds another full day (or two) on each end of the trek.

Permits

The Restricted Area Permits are $100 USD per week that you’re in the valley and can be registered in Kathmandu or Pokhara. If you choose to stay longer than a week, you will pay an extra $15 USD/per day that you’re in the valley. The time begins ticking on these as soon as you arrive in Koto, and will be registered with the municipality on your drive in. Work with your guide ahead of time to procure the permits, as they can take a few days to process and cannot be arranged by individuals.

You will also need to register for the Annapurna Conservation Area Project Entry Permits ahead of time. These can be done by individuals, although your guide can give you advice if you’re confused about the process. If you don’t register for them online, you can also get them in Kathmandu when you arrive. The Annapurna permit costs roughly $25 USD per person and is easy to procure. You just need to bring a passport-sized photo, which you can have taken for you anywhere in town if you don’t have one with you, and bring cash along with your itinerary to the Tourism Board Office; they accept USD or Rupees.

Guides

You also must have a guide with you while hiking in the Nar Phu Valley as part of the protection policies in place. However, having a guide is quite helpful. Because it is so remote, they can answer your questions, help you speak with the locals at the tea houses, and negotiate a good rate.

You usually pay a flat daily rate for your guide upfront for the entirety of the trek. Your guide will then pay for their own lodging and food throughout the duration of your trail, while you pay for your own as you go. The only things you need to pay for, for the guide, separate from their day rate, are any transportation to the trailhead and lodging on the way, as well as their permits while in the Nar Phu Valley. Of course, tipping is also normal and expected in the region; usually $10 USD per day per guide/porter is an acceptable amount to tip at the end of your trek (if you were happy with it!).

We arranged our guide through By Mountain People, a trekking company that has its roots in the Netherlands and is run by a Dutch-Nepalese couple. Their guides speak great English, they’re well-organized and very professional. Additionally, they pay their guides and porters above-average daily rates, which is a benefit of working with them. This is not a sponsored mention; we were just very happy with them.

Finally, most guides and porters in Nepal have below-average gear and work very hard to provide the best experience possible. It is worth checking in with your trekking company before coming to see if you can bring anything to donate that may be of use to their team. This could be gently used trekking shoes, poles, backpacks, jackets, or any other gear that still has life in it.

Getting there

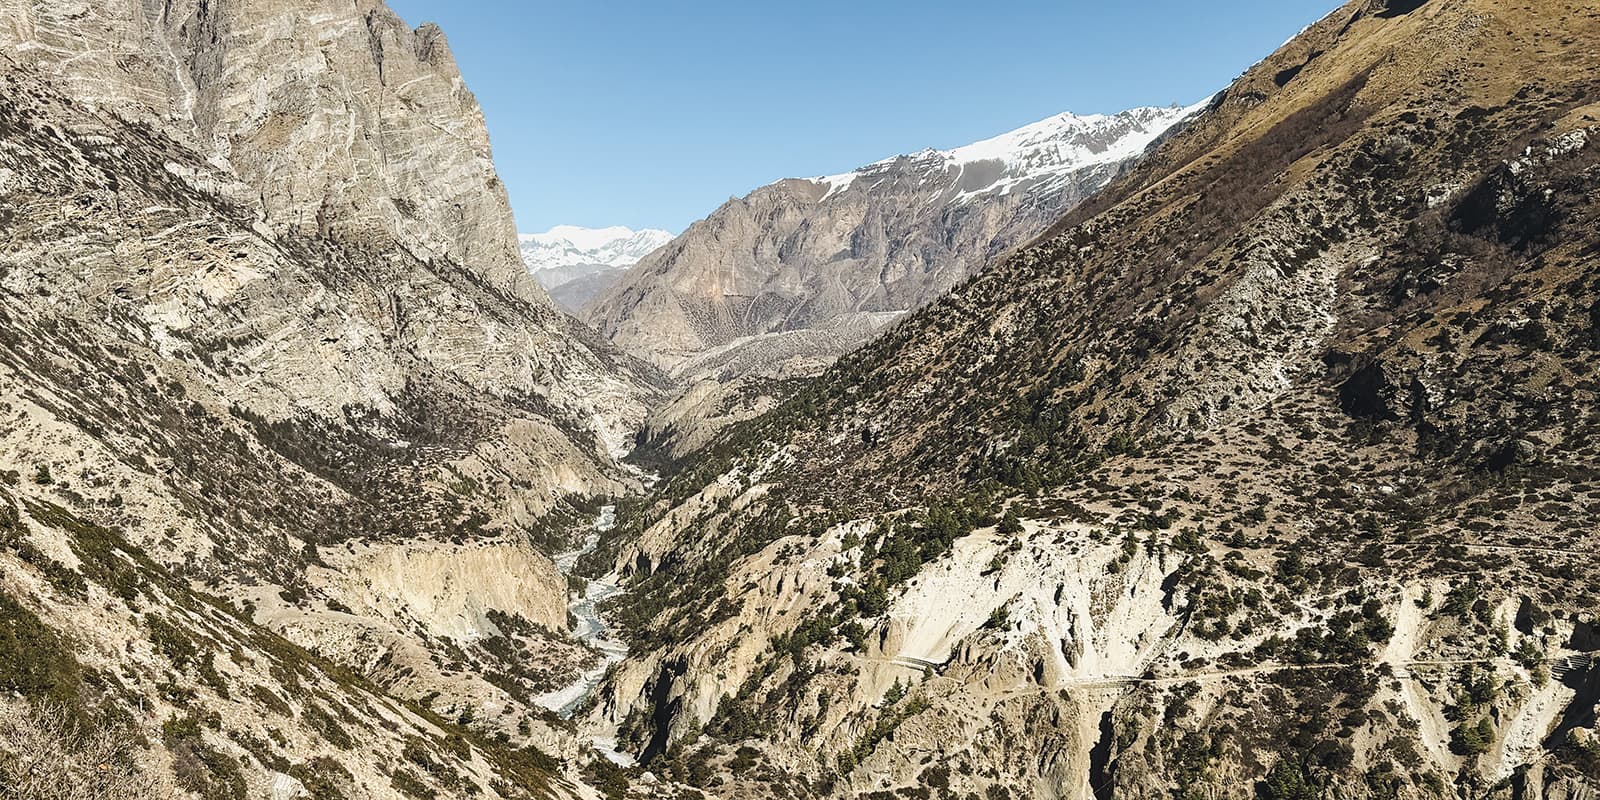
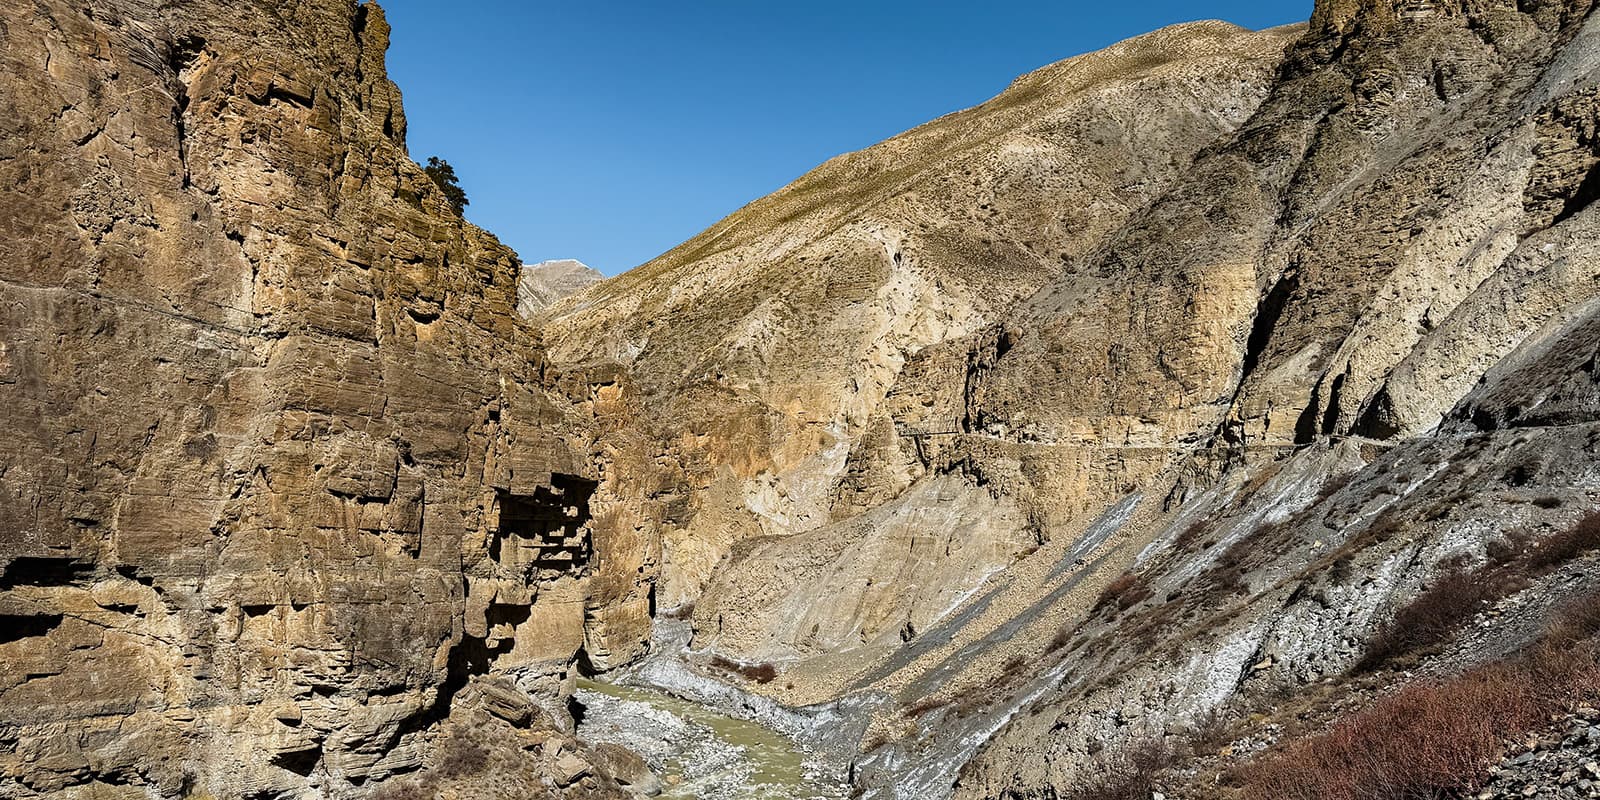
Getting to the Nar Phu Valley trek is an adventure of its own. First, it is important to know that you don’t need to go through a company for your transportation. You can arrange it yourself and ask your guide if you have any questions. Depending on where you begin, Kathmandu or Pokhara being the two most common starting points, you will need to take a bus to Besishahar. From Besishahar, you will need to arrange a jeep ride to Koto.

These jeeps are common throughout town, and your guide will be able to help you find one. They are usually loaded up with products that they’re taking to the mountain towns and rent out the seats to people going that way. Be warned: this is not a comfortable ride. You will spend roughly 3.5 hours bumping along dirt 4×4 roads. They cram in as many people as they can fit, sometimes up to 4 people in the back row. However, this is the only mode of transportation currently available.

If you want the jeep to yourself, you may be able to rent out the entire jeep if there are no other customers waiting to head to Koto. But this means you will pay roughly 15,000 rupees for the entire car, compared to the usual 2,000-3,000 rupees per seat when you ride communally. It is recommended to bring some headphones and music as a distraction, as watching the road for the entirety of the ride can be quite stressful.

Returning from the trek is the same ordeal: you will get a jeep from Ngawal or Manang back to Besishahar, where you will take a bus back to your destination of choice.

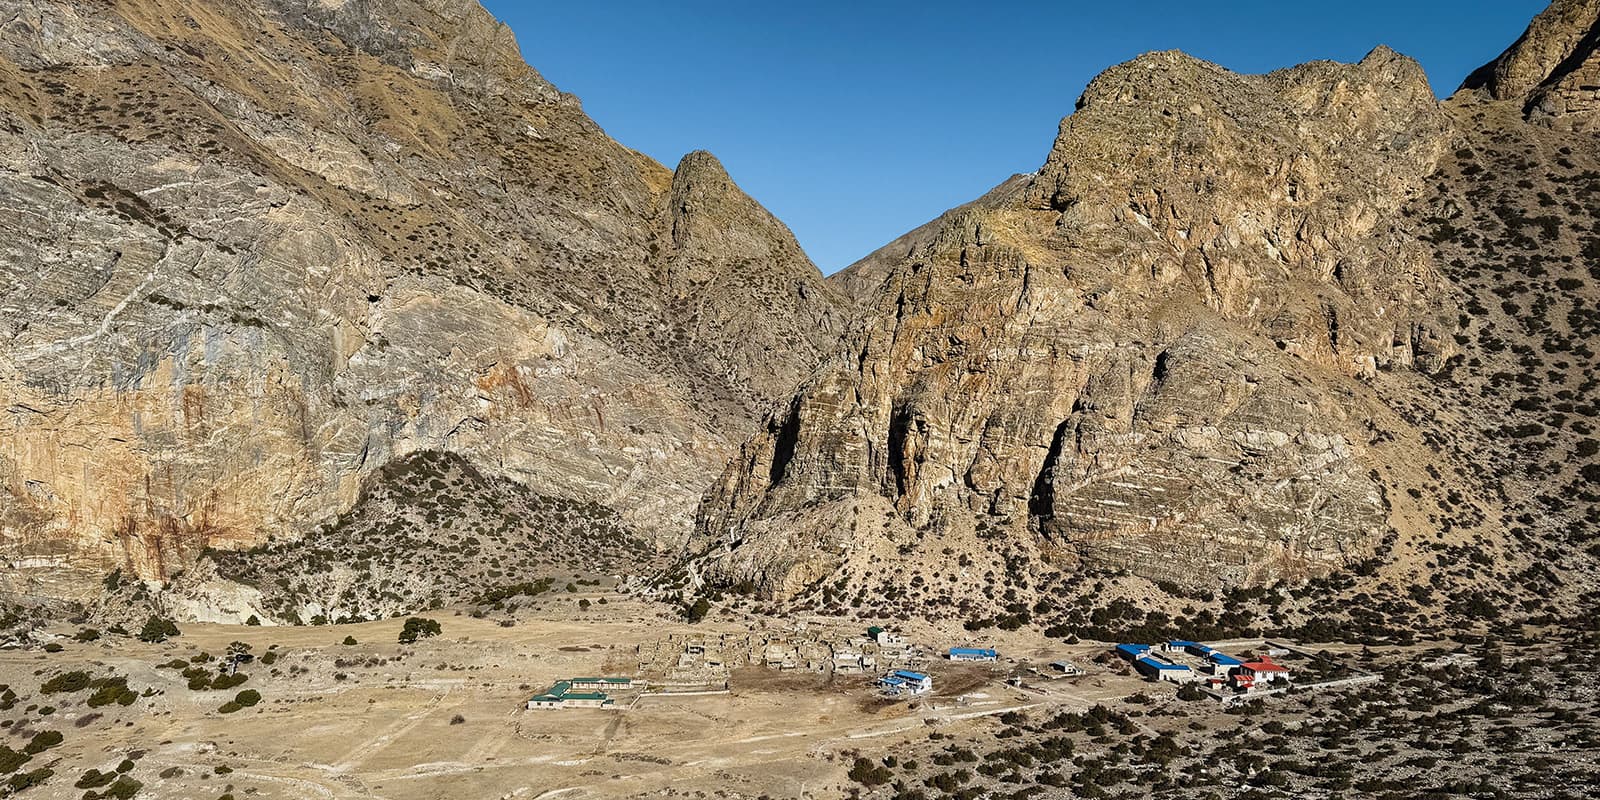
Koto is a passing-through point for the Annapurna Circuit, so you will see many hikers and a few shops where you can stock up on snacks and treats. While you will be able to buy some snacks and candy at the Nar Phu teahouses, you won’t have this many options. Grab your favorites!

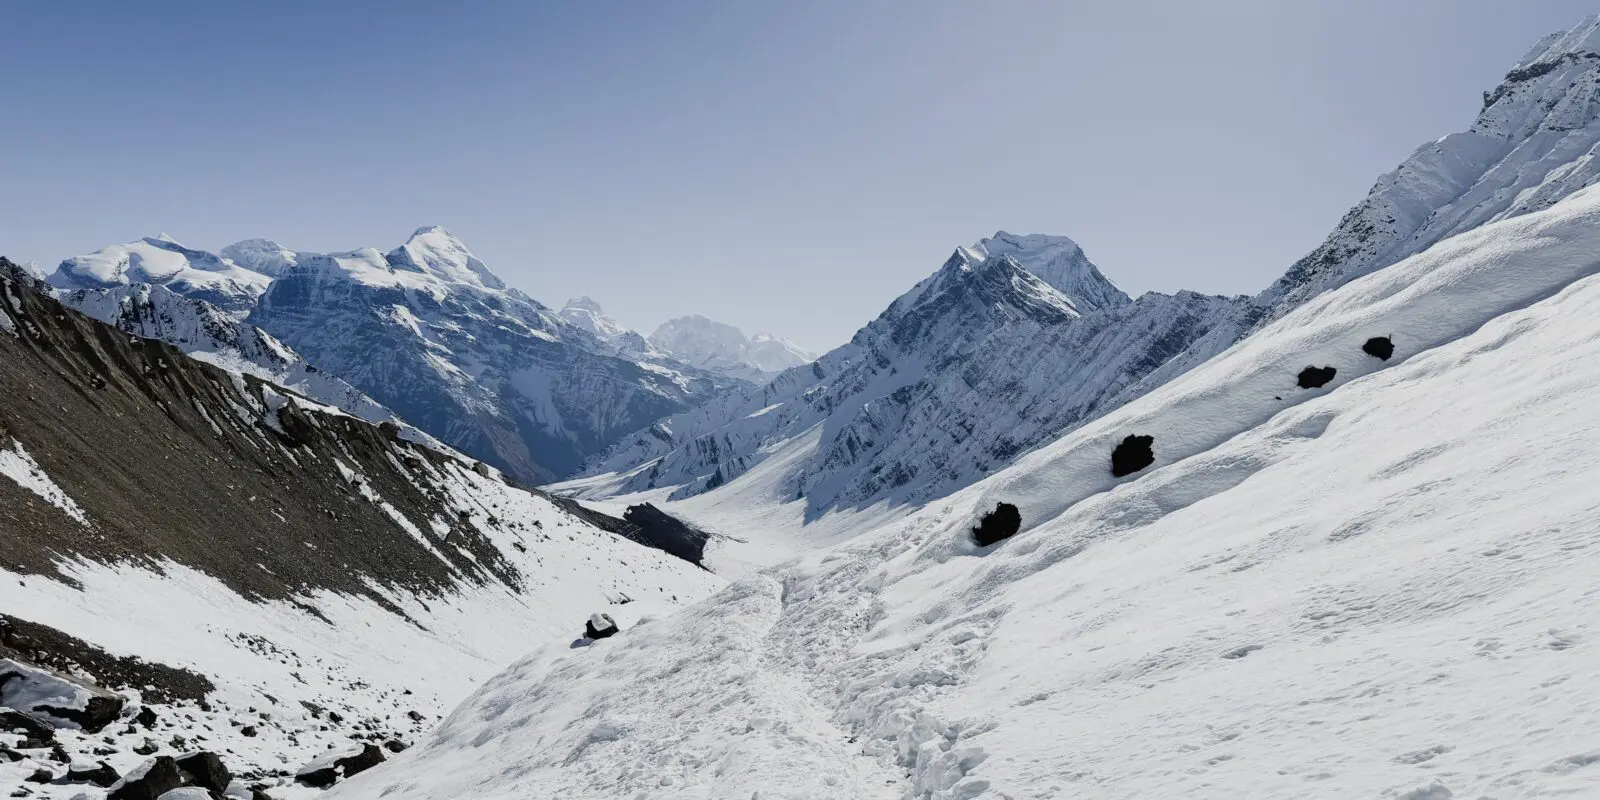
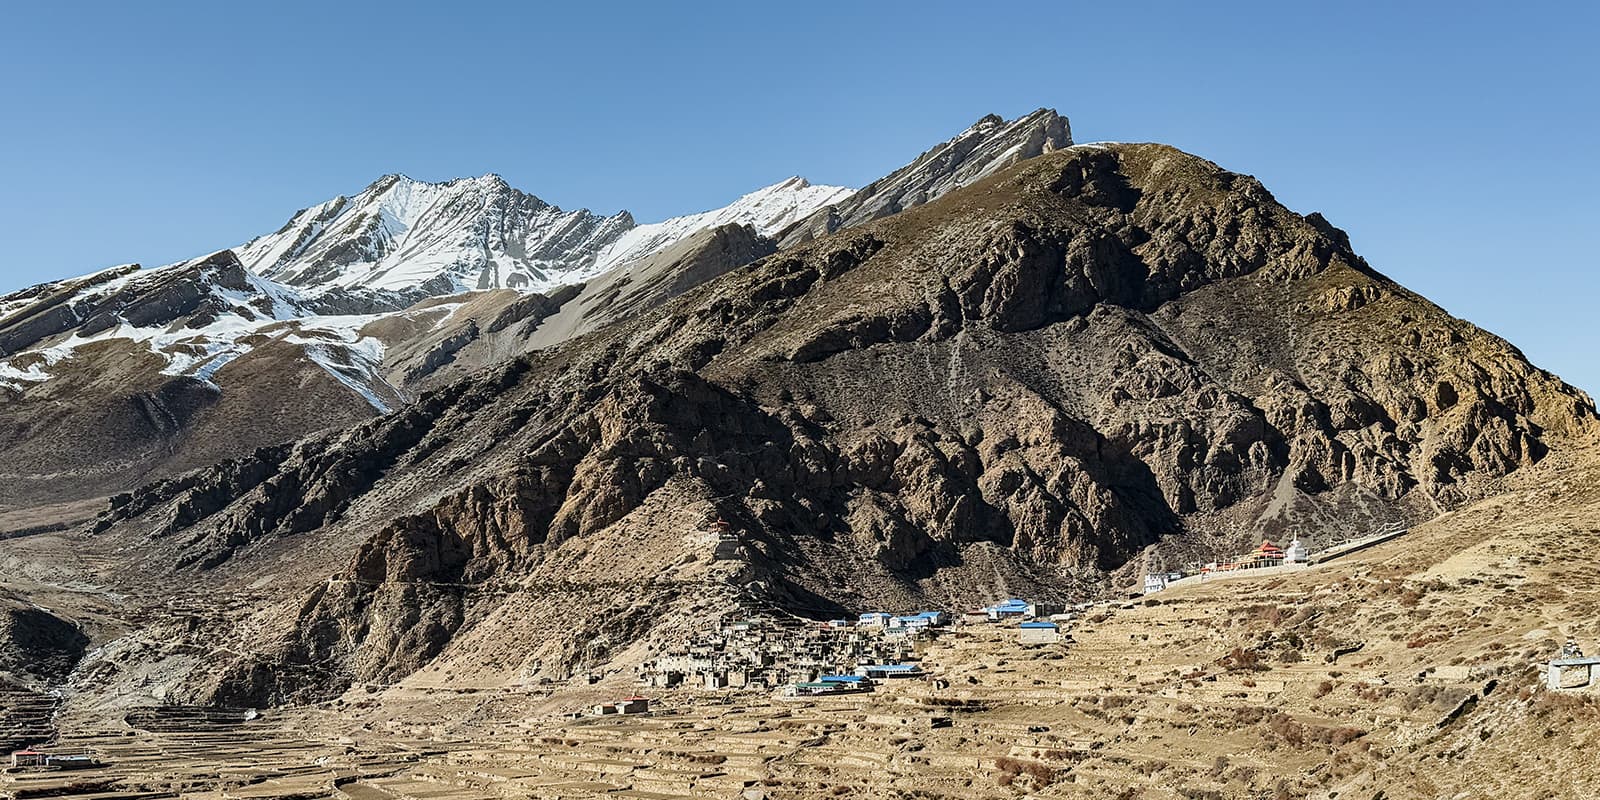
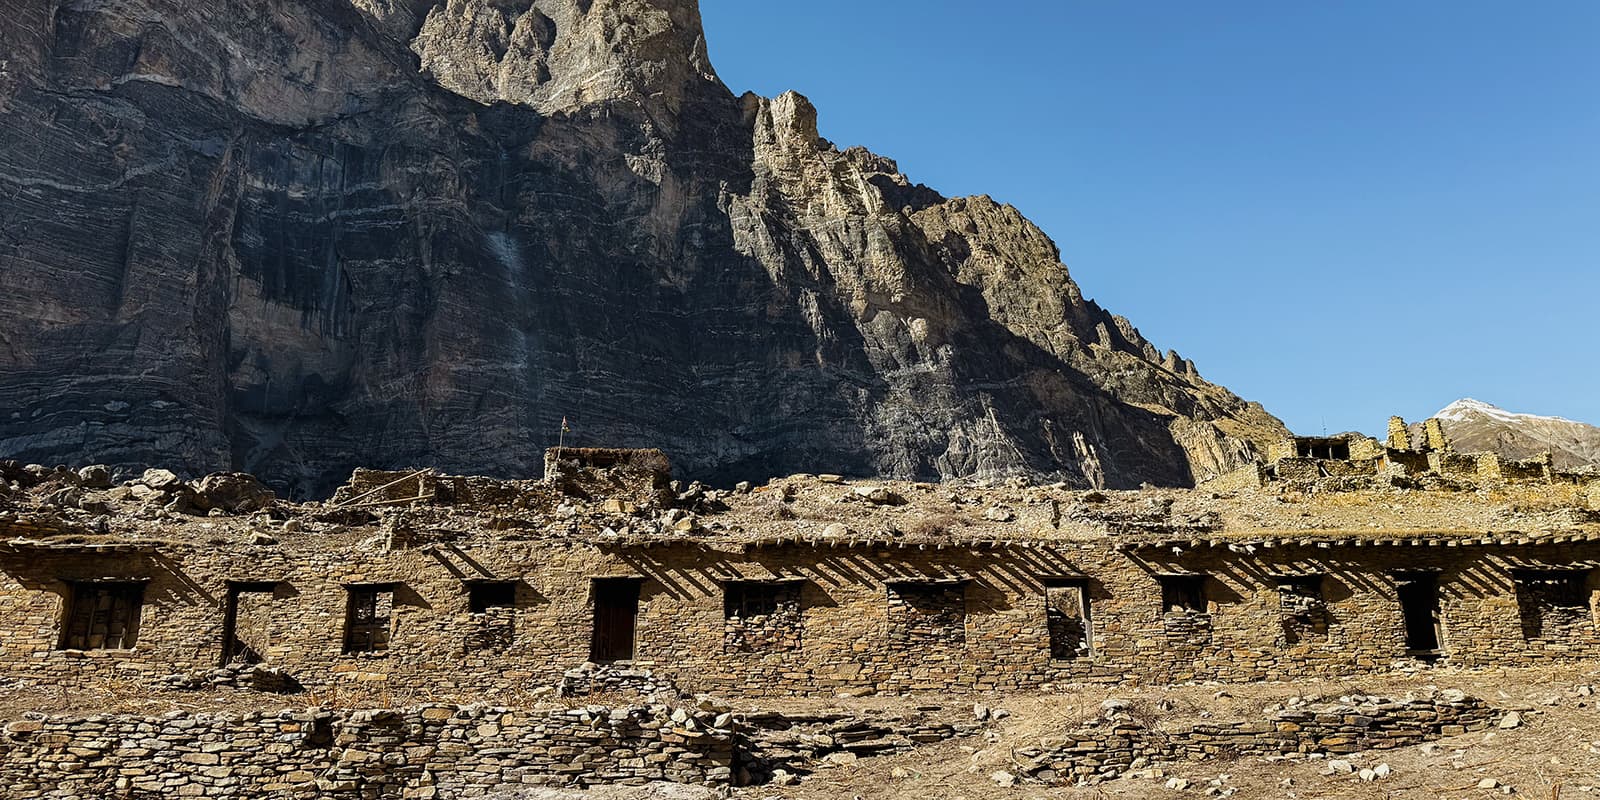
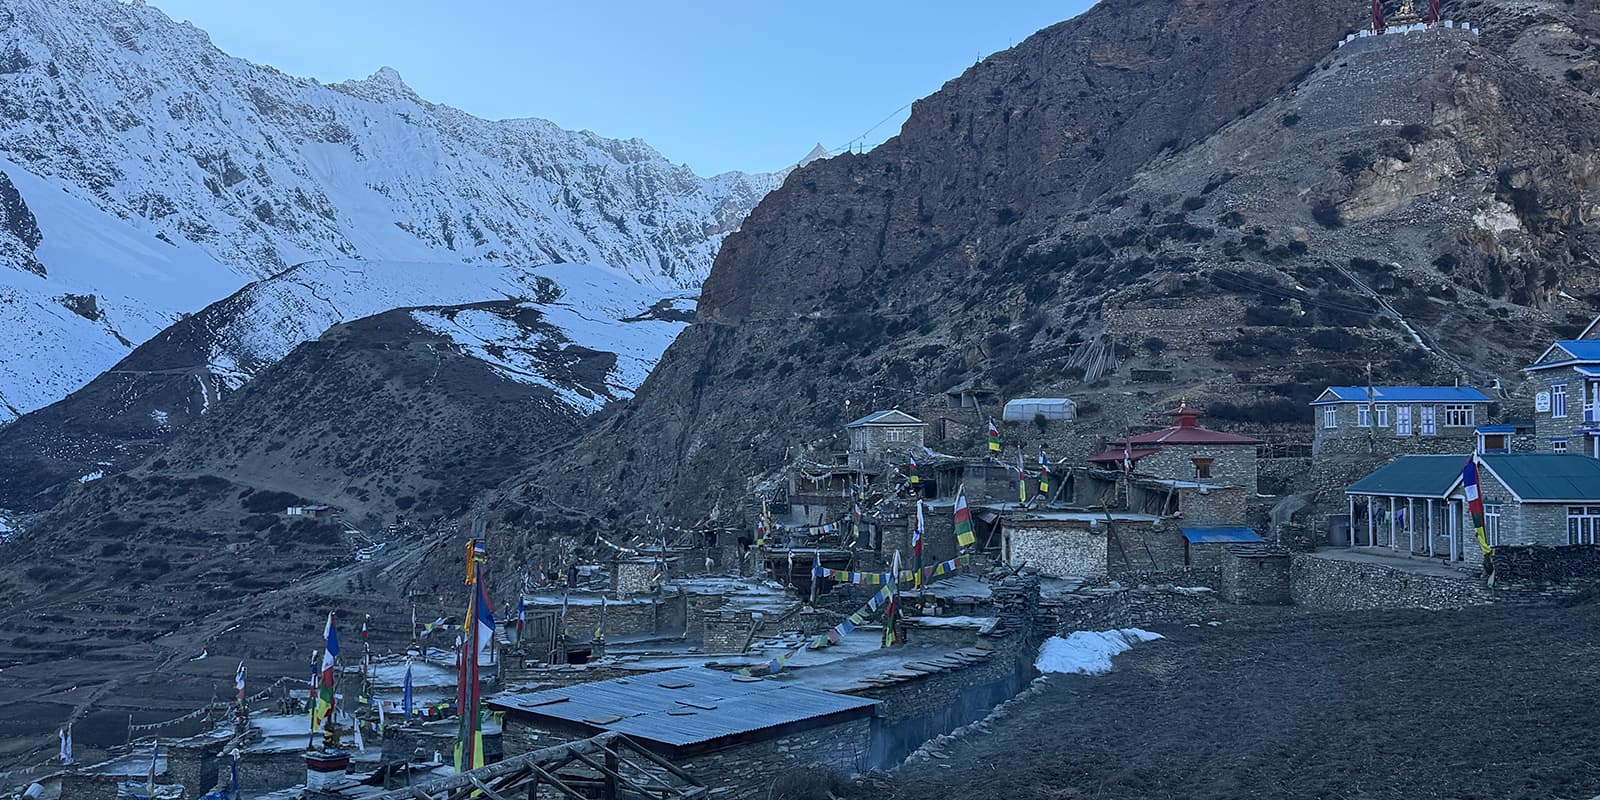
Because the Nar Phu Valley is so under-visited by tourists, you will find that the locals are enthusiastic about seeing hikers and will often greet you with a very cheerful “Namaste” as you pass. The Nar Phu Valley is also very special because there are so few people living here, roughly 1000 local inhabitants, that a lot of wildlife that has disappeared from the more popular regions is still prominent here. One night, we even heard dogs barking nonstop and were told it was because they were guarding their puppies from a snow leopard that was prowling. You will also see lots of yaks, which you should be careful around as they can be quite territorial and aggressive when provoked.

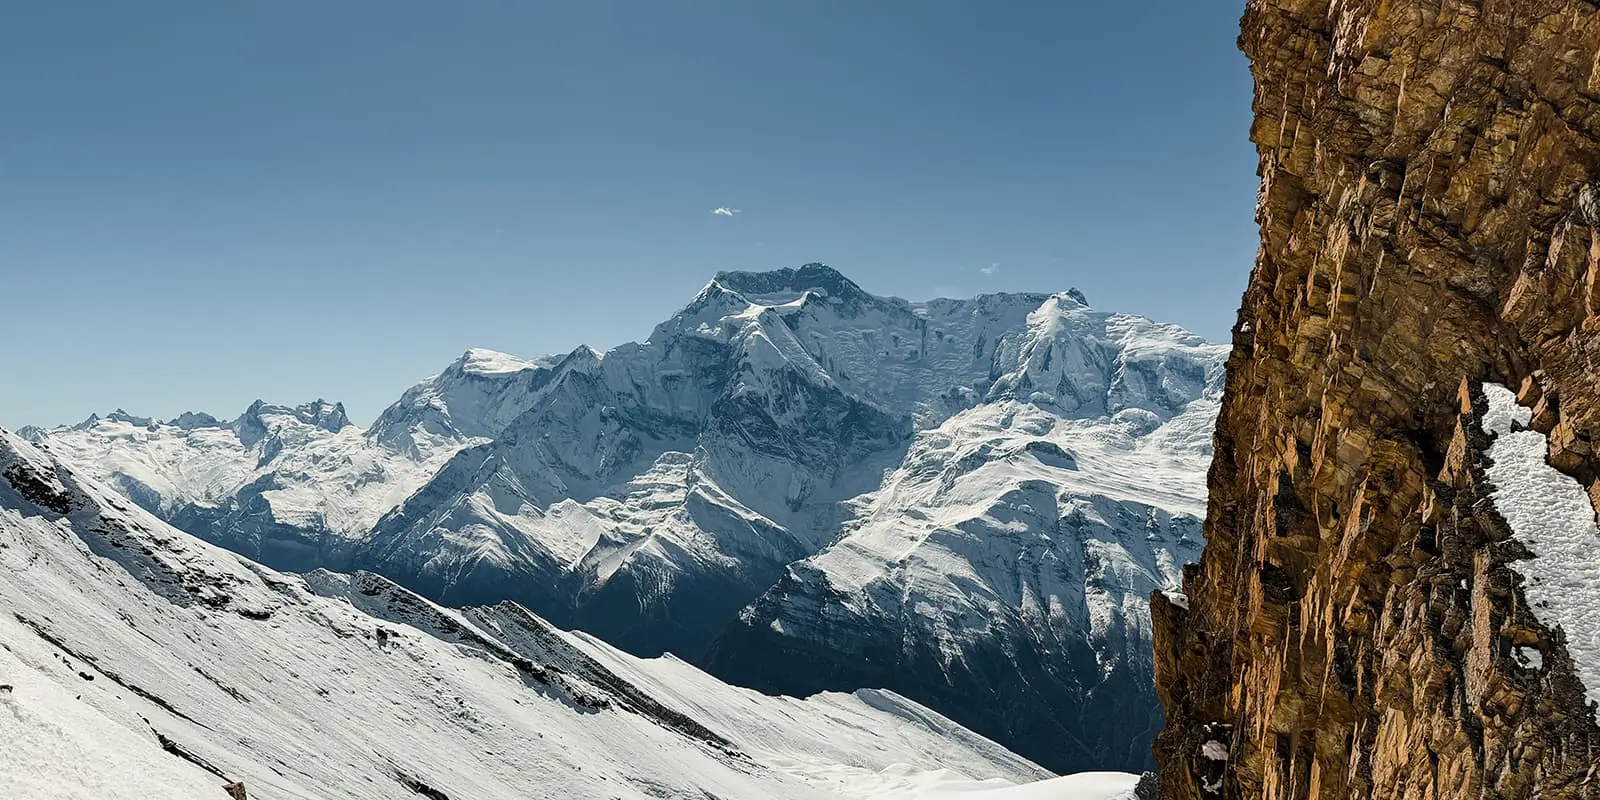
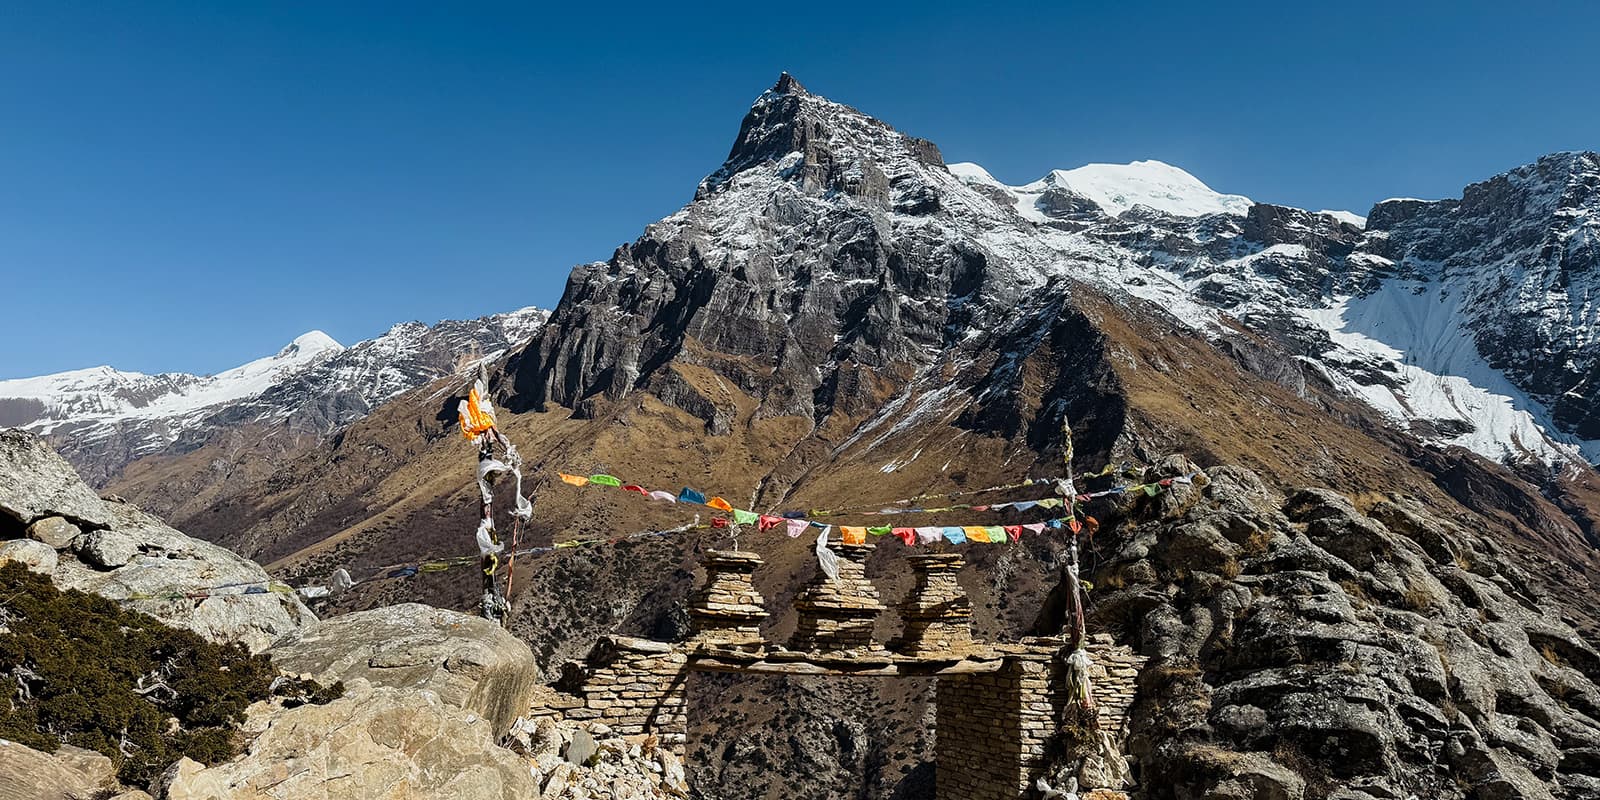
The Nar Phu Valley trek is a very unique way to experience the Himalayas and truly feels like stepping back in time. When you visit these villages and trails, you step into a way of life that has been self-sustaining for centuries.

route
point-to-point
highest point
5.320m (17.454 ft)

Want to submit a trail or make this page more complete?

Always read the disclaimer

Terms of Use: important to all visitors on this website. We strive to publish high quality content and information on this website. However it’s always possible that we’re missing out on some crucial information. In spite of the fact that this route, associated GPS track (GPX and maps) were prepared under diligent research by the specified contributor and/or contributors, the accuracy of such and judgement of the author is not guaranteed. Therefore, hiking-trails.com and contributors are in no way liable for personal injury, damage to personal property, or any other such situation that might happen to individuals hiking or following this route. Should you choose to hike this trail, this is always at your own risk. Check out our guidelines for safety hiking and Leave No Trace principles at the hiking 101 page.

Download GPX

Join the community!

Login or create a FREE account 😊

With an account you can:

Download GPX files

Pin trails to your wishlist

Mark trails as hiked by you

Rate hiking trails

Comment on trails, blogs and gear reviews

Happy trails!
Login

Don't have an account yet? Register here